Avontus Designer vs. AutoCAD: Guide to Scaffold Design Software
Is AutoCAD the best computer-aid design application for scaffold businesses? Find out what Avontus Designer can do for you in… Read More
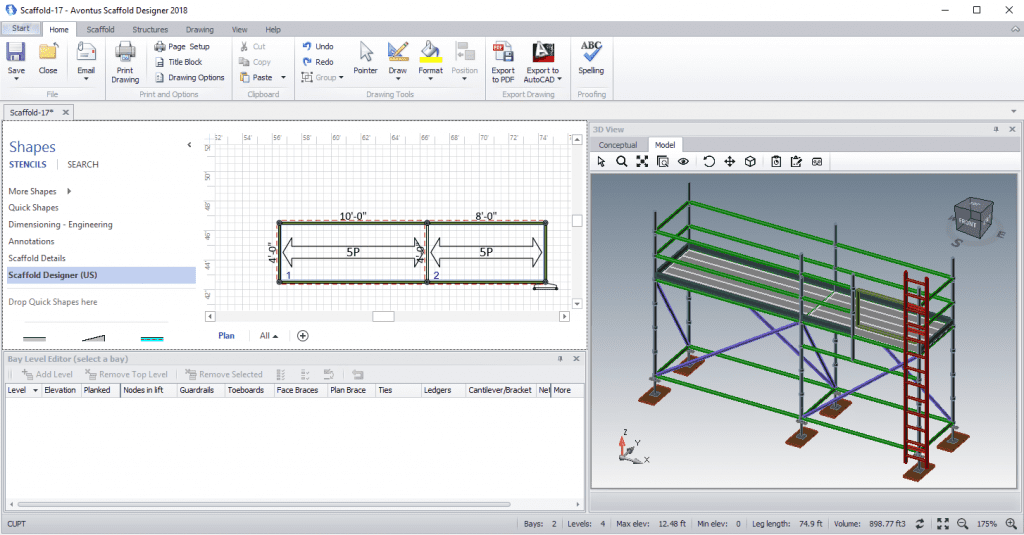
If you’re still relying on hand-drawn scaffolding designs and manually counting materials, you know how time-consuming and error-prone the process can be. In today’s fast-paced construction environment, where accuracy and speed are essential, traditional methods often fall short.
Avontus Designer® solves these challenges by enabling scaffold designers to quickly create accurate drawings and instantly generate a bill of materials (BOM). The software dramatically reduces the time it takes to plan a job, improves design reliability, and eliminates the guesswork of manual calculations.
In this article, we’ll walk through the common problems with manual scaffolding design and material estimation—and show you, step by step, how to use Avontus Designer to streamline your workflow. Whether you’re bidding a job or planning for the field, this tutorial will help you save time, reduce errors, and improve communication with your team and clients.
Let’s begin by looking at the specific challenges that come with relying on manual methods.
Relying on old scaffolding material and cost calculation methods may feel familiar, but it’s inefficient. A major challenge is the disconnect between scaffolding design and material quantity. Many companies either rely on hand-drawn designs, which are prone to human error, or use non-industry-specific software like AutoCAD, which lacks built-in material calculation.
Without a built-in link between the scaffold layout and the parts required, designers and engineers are forced to manually count components or rely on best guesses. This increases the chances of leaving out critical elements, resulting in an incomplete or inaccurate BOM.
Additionally, inaccurate material calculations lead to flawed cost estimates, affecting bidding accuracy and overall project expenses. Mistakes such as overlooking job site conditions or miscalculating the required scaffolding materials can escalate costs due to labor overruns, rework, or additional shipments needed to bring the correct equipment on-site.
When errors are discovered late in the process, it leads to rework, shipment delays, and added labor, all of which eat into timelines and budgets.
A real-world example from Skyline Scaffold highlights how manual equipment counting led to design revisions, higher freight costs, and increased labor expenses. Beyond materials, labor costs are often estimated based on scaffolding metrics, meaning any equipment miscalculation can mean inadequate staffing or inflated labor costs. In an industry where precision is key, small errors can compound, impacting profitability and reputation.
Discover how Avontus Designer simplifies scaffolding design and material estimation below, making your projects faster, more accurate, and fully aligned with your project requirements.
Automate the process and get an accurate Bill of Materials in one click with Avontus Designer.

Our scaffolding design software, compatible with virtual and augmented reality, uses a drag-and-drop interface that gives users the ability to develop scaffolding layout designs and quickly generate a bill of materials for client proposals and scaffold erection.
Looking to improve accuracy and efficiency across your scaffolding business? Get the Definitive Guide to Running a Profitable Scaffolding Business and learn practical strategies you can start using today.
Avontus Designer® supports six major types of system scaffolding:
Explore our in-depth guide to learn more about the 12 common types of scaffolding in construction and their applications.
The software is equipped with a customizable material list, which includes part numbers, dimensions, and descriptions. Dozens of downloadable manufacturer catalogs are available to import into Avontus Designer, and you can tailor the list to include your materials. Designers and engineers can generate a bill of materials (BOM) for any design and export it to Avontus Quantify® to generate a detailed materials cost estimate.
Each BOM provides accurate counts of scaffolding materials and measurements, including total weight and volume, working surface area, and more.
Before you calculate materials, you’ll design a scaffolding structure. The instructions below show you how to design your first scaffold and calculate the materials needed for your design.
After downloading and installing Avontus Designer®, get started by preparing your drawing page. If you don’t have Avontus Designer® yet, now is the perfect time to experience its powerful scaffolding design capabilities—get it today and streamline your workflow.
1. Click on the desktop icon or application to launch Avontus Designer®. The application automatically launches with the option to create a new scaffolding drawing.

2. Select your preferred drawing units – either metric units or US units – and your scaffolding type. A drawing page will open.

Now that the drawing is configured, you’re ready to start designing. Below, you’ll learn how to add bays, edit bay levels, change bay dimensions, and generate a bill of materials.
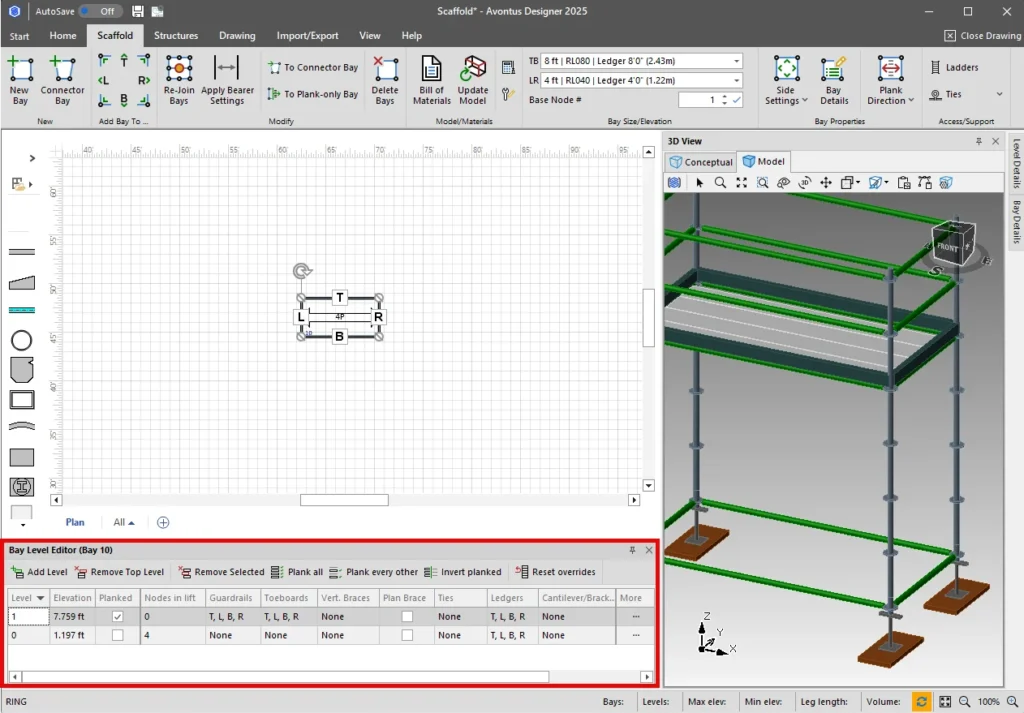
1. To add a new scaffold bay to your design, click and drag New Bay to your drawing page from the Scaffold tab. Once you’ve added the bay to your drawing, you can view the object in 3D and edit the bay level details.

2. Using the Bay Level Editor at the bottom of the application, you can edit the bay settings for each bay level and add levels.
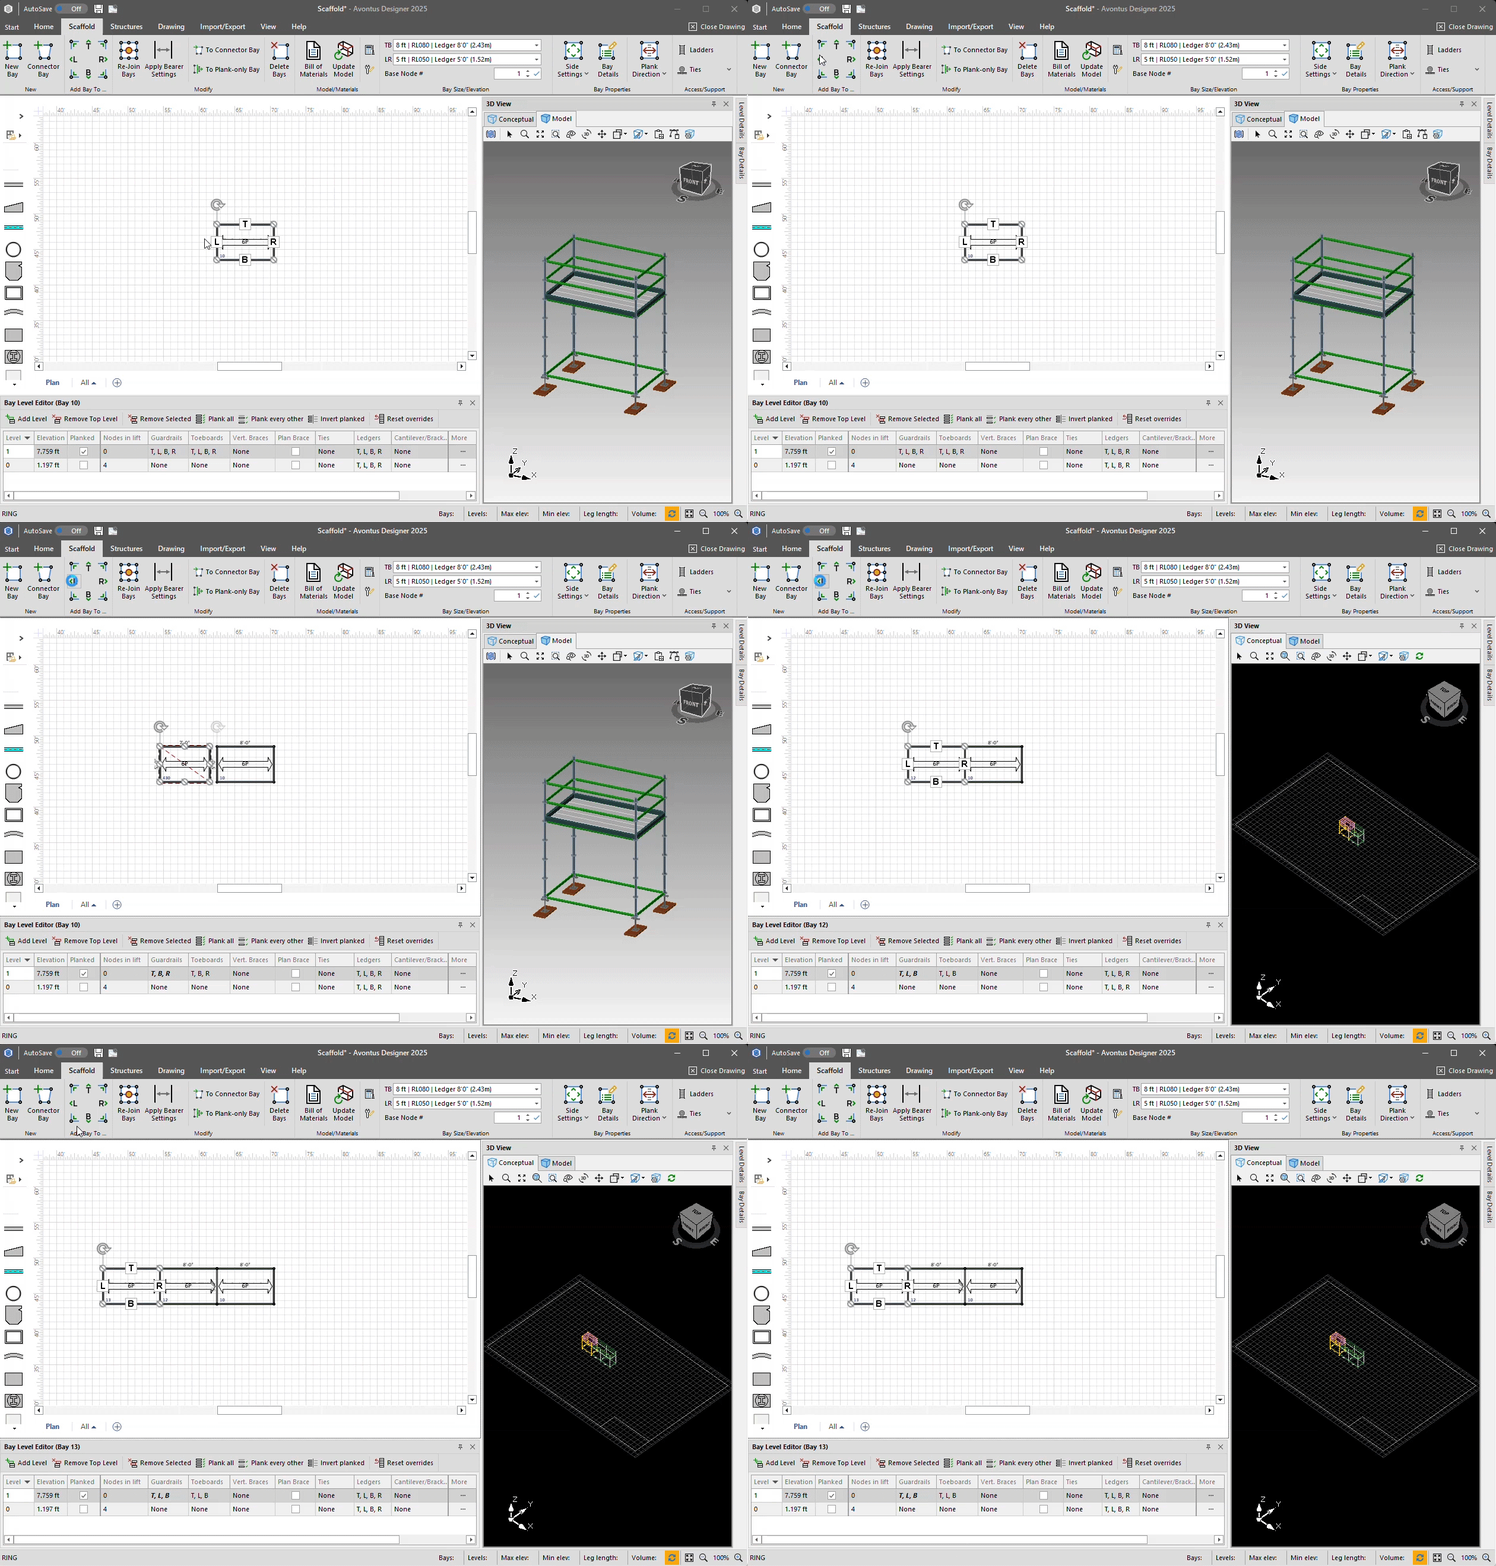
To customize your scaffold design, you can easily change the dimensions of your scaffold bays.
1. Select the scaffold bay from your drawing.
2. Under the Scaffold tab, click on the LR dropdown in the Bay Size/Elevation group and select your preferred size.

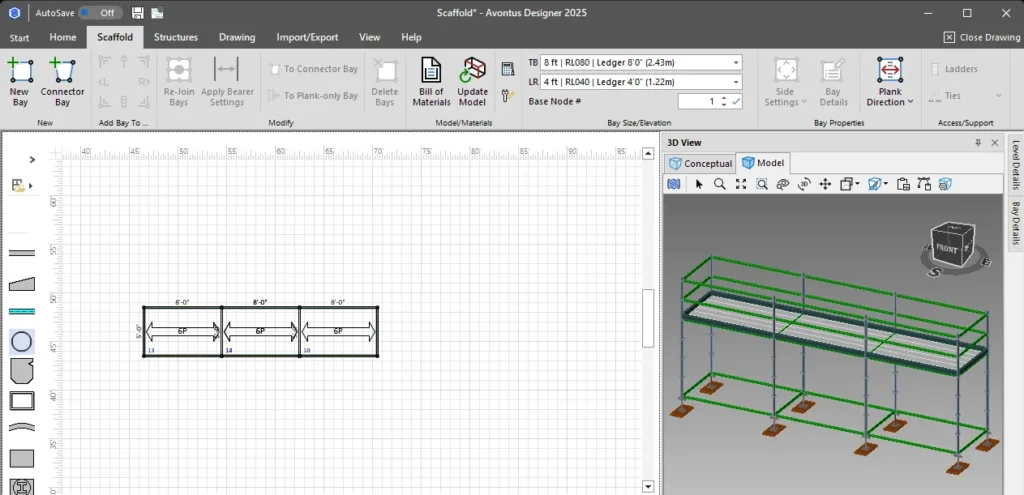
1. After editing your scaffold bay, you can add bays to any side of your design.
2. In the upper-left corner of the menu bar, select a side on Add Bay To… from the Scaffold tab to add a bay to any side.
No scaffold is complete without ladder access and vertical braces, which is why Avontus Designer® has built-in features that give you the power to include both.
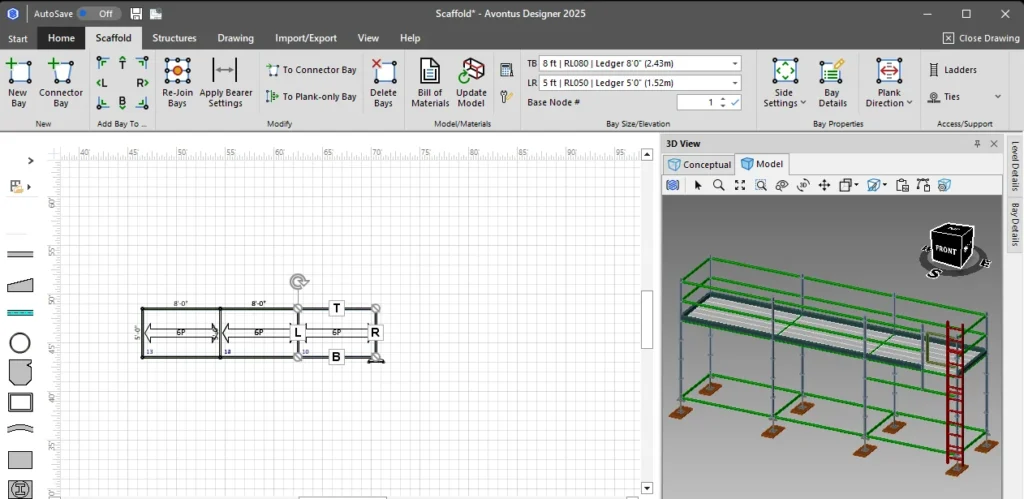
1. Select the bay where you’d like to add the ladder and, under the Scaffold tab, in the Access/Support group, select Ladders. Under Ladder Settings, change Start bay side to B-side, change Side alignment to Right, and Ladder placement to All Outside.


2. You will complete the model by adding supporting vertical braces. Select all bays. Under the Scaffold Tab, in the Bay Properties group, open the Side Settings dropdown menu. On the Vertical Braces section, click on the center green arrows button to select all four sides. Braces will be added to all bays.
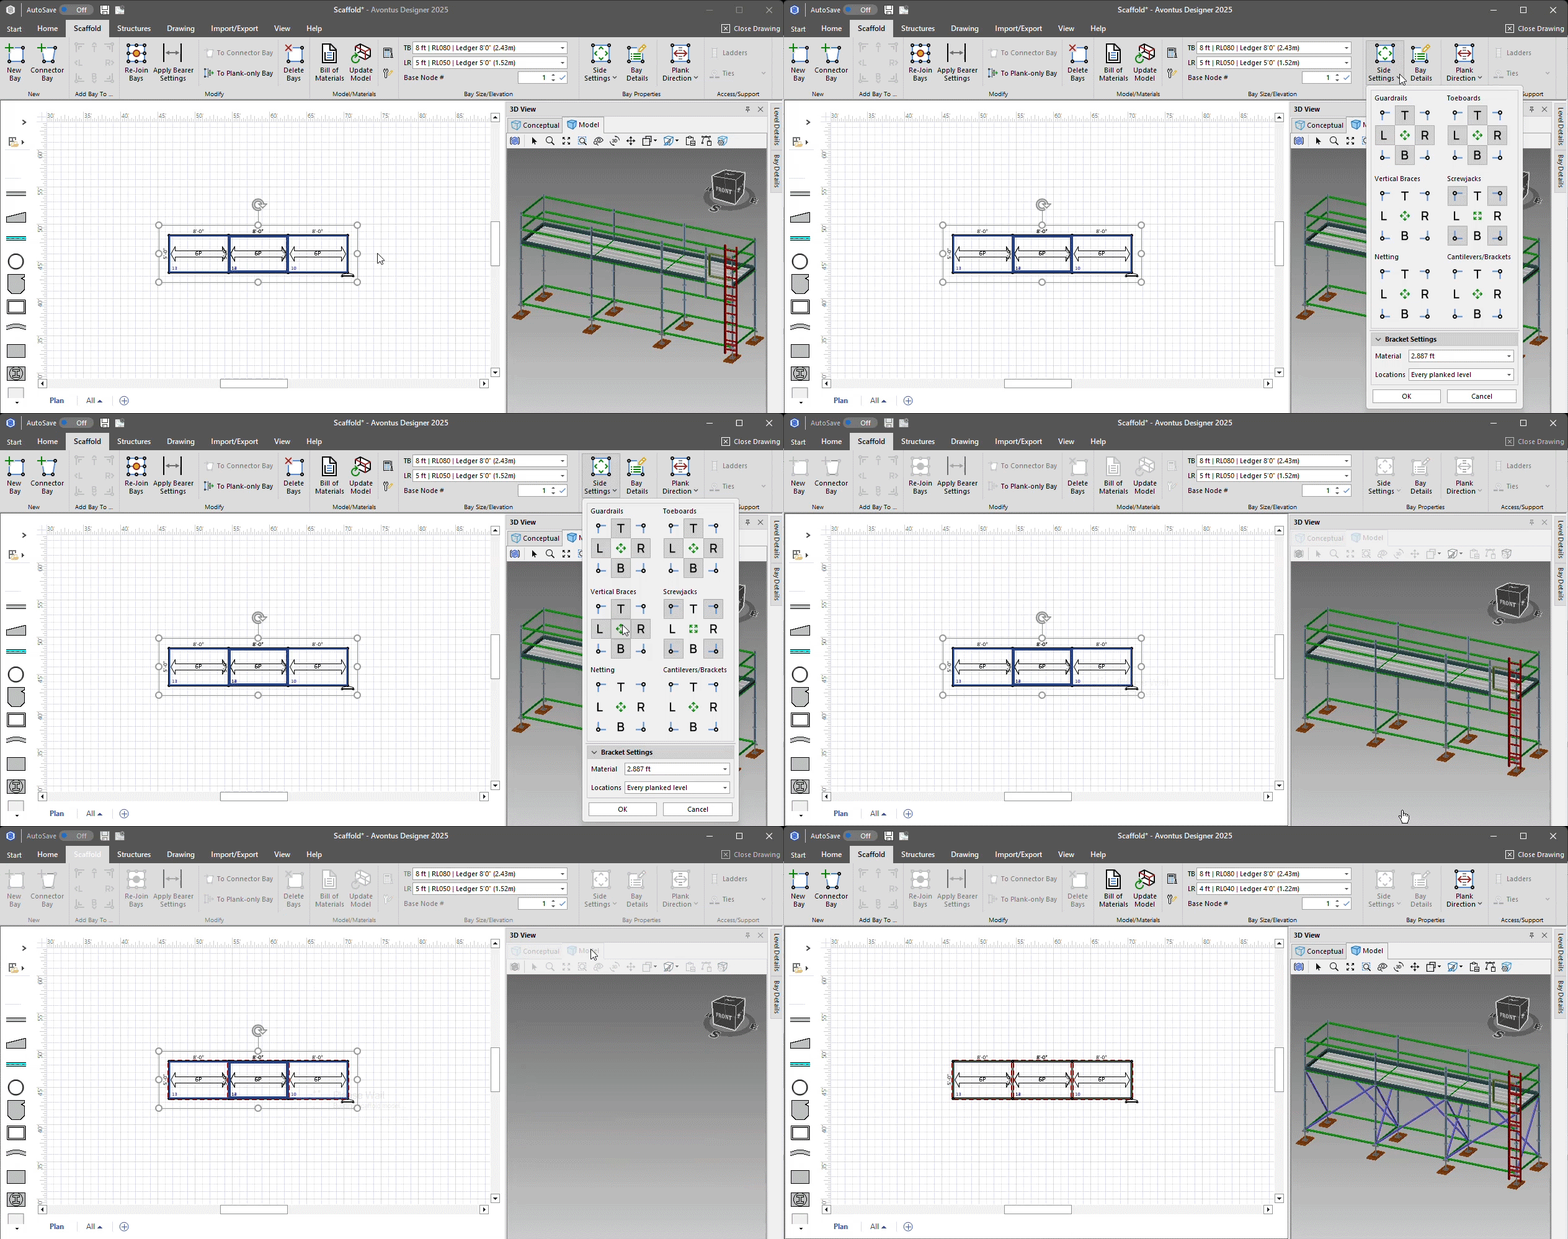
Now that you’ve designed your first set of scaffold bays, changed the dimensions, and added a ladder and braces, you’re ready to calculate the number of materials needed to bring your design to life.
1. Under the Scaffold tab, select Bill of Materials, which will generate an equipment list and show the scaffold metrics, called Scaffold Units, for the structure.

You can modify the BOM as needed to include additional pieces, such as ties and clamps, or modify quantities.
To add parts to the BOM, under the Edit BOM group, select the part required from the [Select Part] drop-down, then click on Add Part.
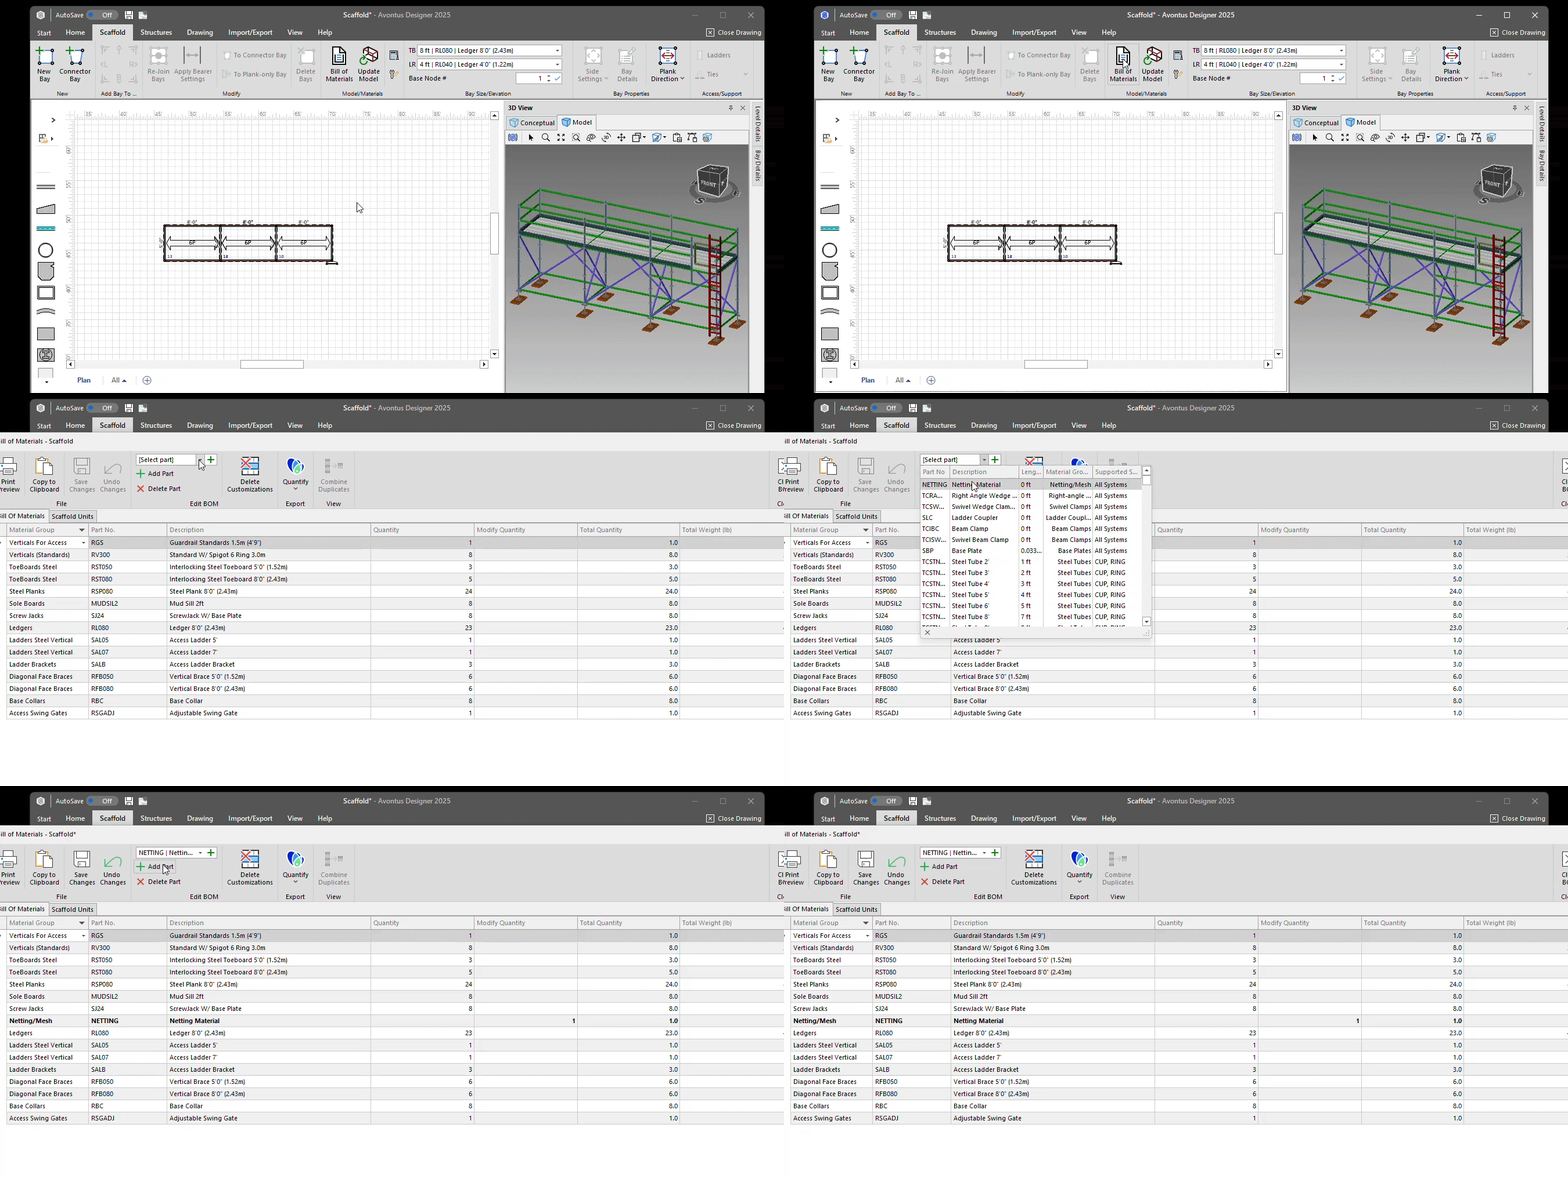
You can also increase or reduce the quantity of a part by entering the difference in the Modify Quantify field. The resulting balance will be reflected/updated in the Total Quantity column.
Rather than exporting separate files for your stakeholders, Avontus Designer® makes it easy to keep the design and bill of materials together.
1. When you’re done customizing your materials, select Copy to Clipboard and then Close BOM to return to your drawing. Right-click anywhere on your drawing page and select Paste to add your bill of materials. You can resize and move the BOM wherever you’d like on the page. You can also add annotations and copy and paste the 3D scaffold image onto the drawing page. Everything is in one place for easy reference.

Congrats on completing your first tutorial on how to design a scaffold with Avontus Designer® and generate a bill of materials. To learn more about using Avontus Designer® for your next scaffold project, contact us or read more about our scaffold design software.

What is a scaffolding bill of materials (BOM)?
A scaffolding bill of materials (BOM) is a detailed list of all parts and components required to assemble a scaffold structure. It typically includes part names, quantities, dimensions, weights, and other key specifications used for planning, estimating, and procurement.
How do I calculate the scaffolding materials needed for my design?
Scaffolding materials can be calculated manually by counting parts on a drawing or automatically using scaffolding design software like Avontus Designer. With Avontus Designer, you can create a scaffold layout and instantly generate a material list with accurate part counts and measurements.
Why is it risky to calculate scaffolding materials manually?
Manual calculations are prone to human error, omissions, and inconsistencies, especially in complex projects. Errors in the material list can lead to inaccurate bids, delivery delays, labor overruns, and rework. Using software reduces these risks and saves time.
Can I generate a BOM directly from a scaffold drawing?
Yes, with Avontus Designer, you can generate a complete bill of materials directly from your scaffold drawing. The software links design elements to material components, eliminating the need to count parts by hand.
Does Avontus Designer support different types of scaffolding?
Yes, Avontus Designer supports major types of system scaffolding, including cuplock, ringlock, kwikstage, HAKI, OCTO, and Safway. You can also customize the material list to match your inventory and preferred manufacturer.
Can I use my scaffolding parts or catalogs in the software?
Absolutely. Avontus Designer allows you to import manufacturer catalogs or customize the parts list to include your scaffolding equipment, complete with part numbers, descriptions, and dimensions.
How accurate is the BOM generated by Avontus Designer?
The BOM is highly accurate because it’s directly linked to the scaffold design. It includes detailed part counts, total weight and volume, surface area, and more, providing everything you need for bidding, ordering, and logistics.
Is there a tutorial for using Avontus Designer to generate a BOM?
Yes. This article includes a step-by-step tutorial that shows you how to design a scaffold layout in Avontus Designer and automatically generate a bill of materials. You’ll find the tutorial in the section above.
Ready to design smarter?
Explore Avontus Designer or book a personalized demo to see how fast and easy scaffold planning can be.